Please note: if you are using Visual Studio 2012 or any one of its later editions, you need to include the Install-Shield Express edition over your current Visual Studio as an add-on. You can click here to register and download this version of Install-Shield Express.
Also, please make sure that your current Visual Studio is updated with update 2 or a later edition.

Starting off, fire up Visual Studio and open the PHPWinService project that we had created previously.
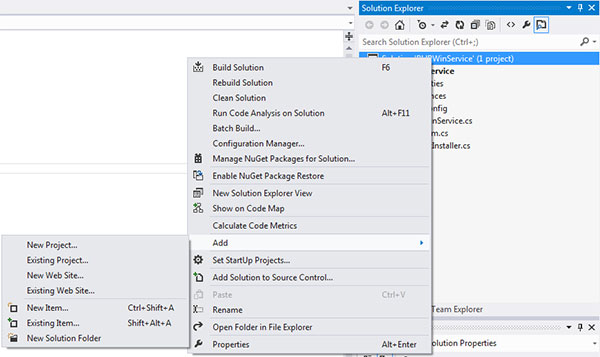
In the Solution Explorer pane, right-click on Solution 'PHPWinService'(this shall be listed over here) and proceed to > Add > New Project.
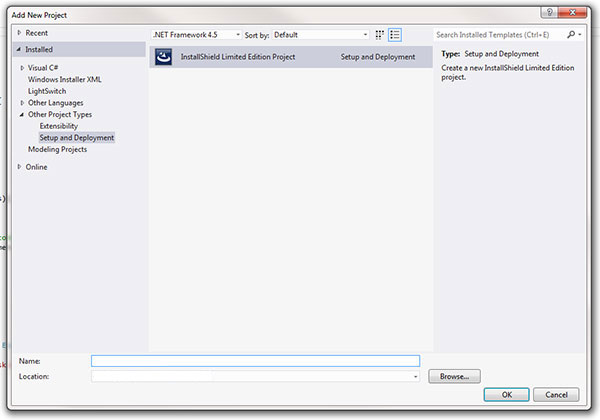
Now you should be able to see the 'Add New Project' window's pop-up: here, search for 'Setup and Deployment' from the query option or locate it manually under - Other Project Types > Setup and Deployment > InstallShield Limited Edition Project.
Once you find it, name it as PHPWinServiceSetup and click OK.

As a result, Visual Studio will therefore create a setup project for you. Now, let's begin with adding the PHPWinService.exe to this setup.
Project Assistant
Start by working through with the Install-Shield Project Assistant - make sure you correctly enter all necessary details and include Primary Output to your final project.You need to follow the steps below for Windows Service before building project.
Run through the InstallShield project assistant and add the primary output of your service to the Application files section (as stated above).
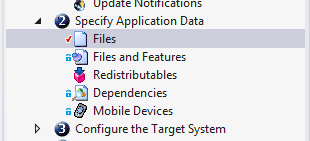
After you are down with the project assistant, double click the "Files" item under step two of the setup project.
After you are down with the project assistant, double click the "Files" item under step two of the setup project.

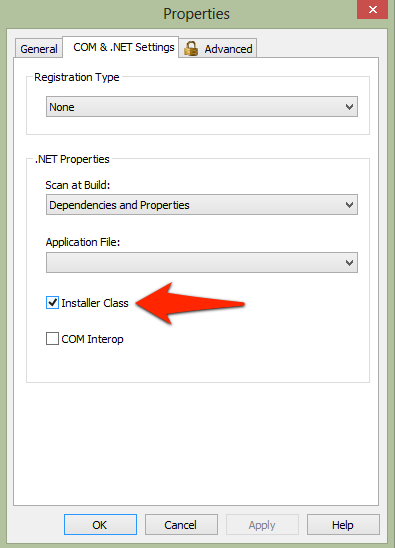
Right click on the primary output of your service, and go to properties.
Click the "COM and .NET Settings" tab, and place a check in the "Installer Class" checkbox.
Click the "COM and .NET Settings" tab, and place a check in the "Installer Class" checkbox.

Build the project
Double-check on all your entries to ensure optimum relevance and accuracy, and then proceed to build your project. Once this is completed, you can locate the final output under PHPWinServiceSetup > bin.Try installing the service and see.
Now test the service by performing a trial installation. It should work smoothly as intended.
Have fun!
Related post -
How to create a Windows Service to run scripts using C# | Part 1
How to create a Windows Service to run scripts using C# | Part 2
How to create a Windows Service to run scripts using C# | Part 3
